Friday, July 29, 2011

Summertime Tin Album - Part II


As promised, I'm sharing the inside of my Summer Tin Album this week.  My first challenge  coming up with something that wasn't bulky, as the tin is quite thin.  I love adding layers and dimension to my projects - so I had to do this without adding too much bulk.  I decided on a simple accordion fold design with only 5 pages.  After measuring the inside of the tin and figuring out how big my pages needed to be, I simply cut and scored 2 sheets of patterned paper and glued them together to get the 5 needed pages.

Materials Used:

3D Crystal Lacquer
Color Crystal Lacquer - light blue glitter
patterned paper
Tim Holtz Adage ticket
Tim Holtz bottle cap stickers
vintage buttons
brown bakers twine
Distress Ink - vintage photo
vintage dictionary pages
pearl embellishment
plastic date disc
Tattered Angels Glimmer Chip - seagull


I cut the same size patterned paper to act as a picture mat on each page.  This way when I'm ready to add pictures, I have a place holder for them.  I made them smaller (I'll print my pictures wallet size) so I could add journaling and any small memorabilia (ticket stubs, receipts, pressed flowers, etc) to the page.  On this first page, I added a plastic date disc that I cut to fit on the edge, a Tim Holtz ticket and my infamous paper flower (made from old dictionary pages).  Only this time I slathered the flower with Crystal Color Lacquer in light blue glitter.


I love the way it turned out - it's rather stiff, so would also make a great pin or addition to a hair band.  These are so easy to make, that I made some in several different colors that I'll be able to add to other projects!


On the next 4 pages, I just added a variety of patterned paper and small embellishments including buttons, twine and an alligator clip. 


I traced the design on the paper here with same Crystal Color Lacquer that I used on the flower.  I love the dimension it gave and I also liked that when I inked the edges, it resisted the ink, which made it "pop" even more.


For these cute little bottle cap stickers, I simply covered them in 3D Crystal Lacquer and let dry overnight, which gave them a bright shiny coating.


Here's the cover of the completed album - all ready to receive my summer memories!  Now, I just need to get busy and make some worthy of my album!


  I couldn't just leave the back of the album blank, so for a bit of whimsy I decided to do the same technique to mimic sand (3D Crystal Lacquer sprinkled with Distress Embossing Powder), and add a fancy little seagull.

I hope you enjoyed my project.

Until next time....stay creative and have some summer fun!


visit
 www.sakuracraft.com for more ideas on how to create with 3D Crystal Lacquer
and
www.crystallacquer.blogspot.com for more project ideas and inspiration!

Saturday, July 23, 2011

She Canned it Anyway

We were visiting my mom-in-law, Ruth, earlier this week and she had a bounty of Meyer Lemons.  I love lemons, always have.  I remember as a young girl picking the lemony orbs and loving their fragrance.  I once sliced them and floated them on my bath water - must have read something in my favorite magazine about the advantages of doing so.   We brought home several pounds of lemons and a recipe for Lemon Marmalade.  I'd heard of Orange Marmalade, but never Lemon....I was intrigued.  I'd been wanting to try my hand at canning this year...I had done it in the past, when I lived in Oregon and had mountains of blackberries to deal with, and I was itching to do it again.


 I just needed a few items - like canning jars, lids & rings which were easy to get - and I was set. 


The recipe was simple - lemons, sugar, water.  After slicing the lemons and letting them sit overnight in the fridge, I added the sugar and started the cooking process.  The skill is getting to the "jelly point"  - which I kept reading about online while investigating different recipes.  I had my trusty candy thermometer, so I just had to be patient enough to get just the right temperature.


TA-DA!  Easy peasy!  The hardest part was waiting for the mixture to get to 220 degrees!  It's very yummy - of course we had to sample it!
Now I'm trying to think of what's next - I've got a few jars left........off to find more recipes!

Until next time....get creative in your kitchen!


Friday, July 22, 2011

Mountain Top Gardening


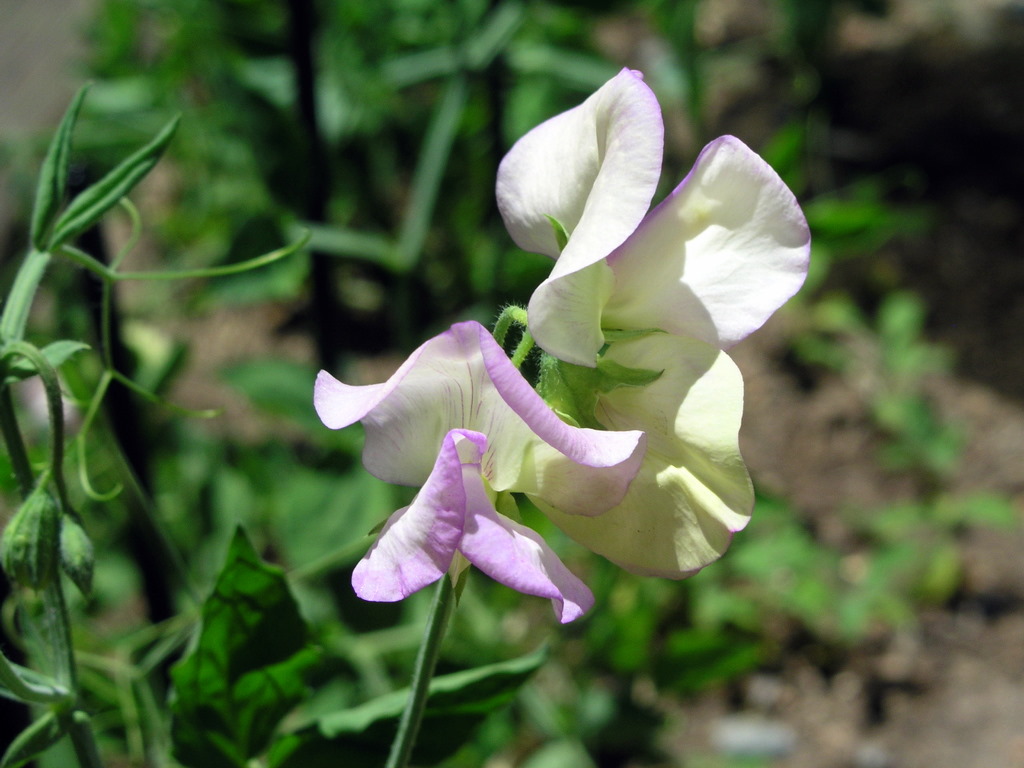
Well here she is....my first Sweet Pea bloom of the season. 
I'm so excited to finally see her and a few others in my first attempt at flower seed sowing at 6100 feet elevation. I had bought some packets of seed at Descanso Gardens back in April.  I was so enchanted with the beautiful images on the packages, that I just HAD to buy a few.


I was so in love with them, that I made a page for them in my journal along with a planting map of where they were planted in my little garden patch.  I planted two varieties of Sweet Peas - Explorer Mix and April in Paris.  The photo above is of the April in Paris variety and I have one purple bloom from the Explorer Mix.  I have a few Columbines growing, no blooms yet and I haven't seen any of the Zinnias.  I do have some Marigolds with a few buds along with one tiny Rosemary plant and the Sage seems to be doing really well.
With some 30 degree evenings and some very cold days, I didn't think I would have much luck with the seeds - but am so happy to see that it could be done....with a lot of patients, a little water, some sunny days and a little pixie dust :)


Thursday, July 14, 2011

Summertime Tin Album - Part 1

Summer is my favorite time of year - so when I received this metal case from Sakura for this month's projects - I knew I wanted to make an cute little mini album for this year's summer pictures.  I will be doing my album in 2 parts this month, this first one showing the cover of the Summer 2011 Mini-tin Album.  Here's the list of supplies that I used.

Small metal case
Patterned paper
Beach-themed cutouts
Rubberstamps from Tweety Jill
Chipboard Adirondack chair from Tattered Angels
Brown twine
Distress Embossing Powder
Distress Ink
Glimmer Mist


I first cut a piece of scapbook paper (I used a piece from a Tim Holtz paper stack) slightly smaller than the front of the case.  I distressed it with a distressing tool and inked it with vintage photo distress ink. I measured a length of ribbon (this will be used to tie around the album) about 16" and glued it on the front of the case, and then glued the paper on top.  After that was dry, I ran a ribbon of 3D Crystal Lacquer along the bottom in a wavy pattern,


and poured out the one thing I had on hand that resembled sand - Distress Embossing Powder in Antique Linen.  I let that sit overnight - then just tapped the excess off into my handy dandy tidy craft tray and replaced the unused bits back into the bottle.


 I used beach images from Graphic 45 paper, cut them out, did a little distressing and inking and tied the tag around the "Beach" piece, using brown twine, before gluing it down.  The stamp looking embellishment is a Tweety Jill stamp that was embossed and colored with distress ink (red barn and vintage photo).  I also stamped the background paper with a few beach images using Tweety Jill stamps.


The Adirondack chair (Tattered Angels Glimmer Chips) was sprayed with several colors of glimmer mist, dried and inked a little bit with Vintage Photo distress ink, then sanded around the edges to give it a worn and antique look. I really like how the embossed areas popped  after they were misted and inked!  


For the last little embellishment, I hand wrote "Summer 2011" on a scrap piece of polka-dot paper, distressed and inked it and glued in onto the album.  It was given a nice coat of 3D Crystal Lacquer and dried overnight to give it a nice shine. 

I'll be sharing the inside of the album next time! 

In the mean time...stay creative!

Karen

Visit www.sakuracraft.com for more information
 on 3D Crystal Lacquer and all their great products
and
www.crystallacquer.blogspot.com for more Design Team projects

Wednesday, June 29, 2011

Sakura Hobby Craft Blog Hop

If you came from Jennifer Van Pelt's  blog you're in the right place!
<><><>
<><>
My name is Karen Myers and I  am on the Design Team for Sakura Hobby Crafts.  I hope you are having FUN and enjoying our projects we are sharing with you today.


I totally moved off the page with this project.  I'm redoing one of my bathrooms in a "Seaside" theme and had this Mary Englebreit calender page laying around waiting to be framed.  It's 12 x 12 size was perfect for an inexpensive scrapbook page frame - which I of course couldn't leave alone.


Here are the supplies that I used to complete this project.

1 12 x 12 frame
Fine Tarnished Silver Glitter
Idea-ology Tissue Tape - Symphony
12 x 12 Calendar page
Assorted beads & Shell from my stash


I used the tissue tape to cover the frame.  It was easy and fast to apply.  I just folded over the edges to the back and used little pieces to cover up any small tears or places that I missed.


Now the fun part.  I wanted to use the Gem Particles to cover the frame and give it lots of shimmer.  I mixed the Gem Particles with a tarnished silver glitter on a paper plate, got out a paintbrush, started brushing on Crystal Lacquer over the tissue tape and sprinkled on my gem particle mixture.


I let each side dry for about 30 mins. before I started on the next side, just so I wouldn't have a sticky mess to handle while I applied the gem particle/glitter mixture.  I loved the way it turned out - very shiny-sparkly and kind of chunky!


At this point, I was really happy with the frame and added the picture thinking I was done...but I had an idea to add some sparkle and glimmer to the front of the picture as well, and I had some gem particle/glitter mixture left...and a cute little bottle of beads was staring at me, so I thought....why not!!


This was SO easy!  I applied a thick line of Crystal Lacquer right on the glass of the picture frame underlining the quote on the picture.  Then I just sprinkled some beads, a large green pearl, the gem particle/glitter mixture and added a shell.  I let this dry overnight.  I loved the way it turned out!  Now all those calender pages I've collected over the years are staring at me.........

Till next time...stay creative! 


Next you will be going to Chelsea's Blog ! 
 Have fun, thanks for stopping by, and make sure you become a follower of mine and leave a comment to be eligible for the BLOG CANDY*!

*To get the blog candy you must  become a follower of all the blogs including this one and leave a comment on all the blogs. It's that easy...Terri Sproul will pick a winner and post the winner on the Sakura Hobby Craft blog on July 3rd...  Good Luck!

Thursday, June 23, 2011

Hurray for the Red, White and Blue!


Have you ever started a project and then WHAM...you got an idea that took you in a totally different direction?  Well, that's exactly what happened to me with this week's project...I just love the creative process!  What had originally started out as cupcake picks (yes, I was going to show off my baking abilities!), turned into this awesome banner!  I know what you're thinking...."Darn, I would rather have had some cupcake pics!"  Well, maybe next month!
I have a ton of pictures to share in this post, so I hope you enjoy them all! 
 Here's the loooong list of items I used:

Chipboard
Idea-ology Seasonal Paper Stash (4th of July images)
AccuCut Pennant Die
Distress Ink in Vintage Photo, Old Paper, Faded Jeans and Barn Door
Stampers Anonymous Fabulous Flourishes RubberStamp
Crepe paper streamers in red, white & blue
Glimmer Mist - in various colors
Acrylic Paint - red
Accucut Scallop Circle Die
Tim Holtz Alterations Sizzix Decorative Strip Die - Paper Rosette
AccuCut Fringe Die
White and Red Cardstock
Blue Glitter Paper
Pearl topped hat pin ,a tiny price tag & 3 clear rhinestones
A strip of red rhinestones
2 Idea-ology Hinge Clips
2 skewers "borrowed" from my kitchen
Oh! and 2 stars from a box in the basement marked "Christmas decor"

Wow - that's a long list, but you know how it is when you start going on a project, you just keep adding things!
Ok, so here's how I made the "cupcake" picks.  Very simple really, especially with the magical rosette die - if you don't have one yet, get one, it makes rosettes in a snap!


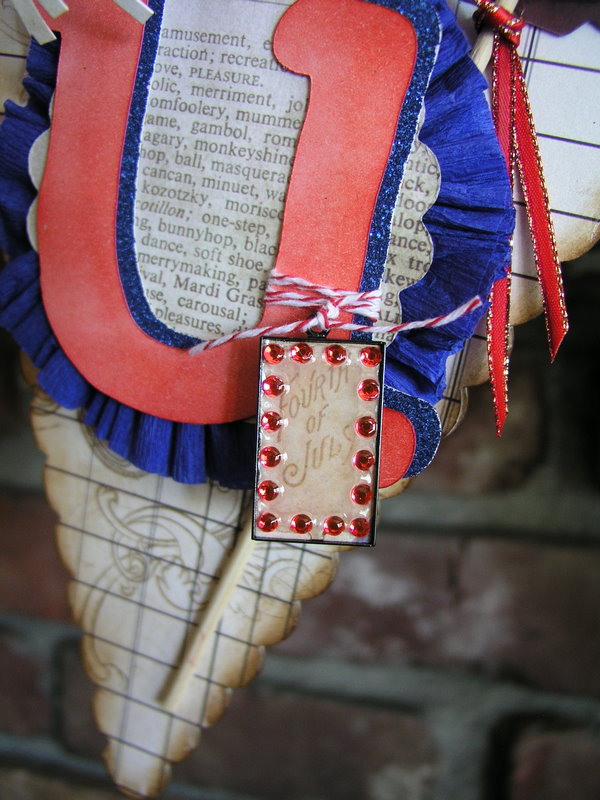
I printed out words using the My Underwood font onto plain printer paper.  I used "God Bless America" and "Happy 4th of July" for my rosettes.  I cut each word out, distressed the edges and glued them on the rosette center.  Then I covered the center with Crystal Lacquer.


You can see in these photos that the edges are sparkly blue.  This is the Gem Particles by Sakura and here is how I applied it.  I made a puddle of Crystal Lacquer on a paper plate along with a mound of the Gem Particles.  I dunked the edges of the rosette in first the crystal lacquer and then the Gem Particles, going around the entire edge and then set it aside to dry.


I glued the rosette onto a scallop circle, then glued a skewer behind the rosette, using Crystal Lacquer.  Ta-DA!


This is where things kind of got fuzzy.  I had my picks ready to go - (just go upstairs and make the cupcakes Karen)....but alas, I somehow got the idea to put these cute little numbers on a banner....a U S A banner...for the 4th of July....yeah!  So, 2 days later....and a lot more doo dads, I finished it!  Here's some more photos of the finished project.

For the firework-looking doo-dads, I just used my Accucut Fringe die.  You could also, just cut fringe with your scissors, leaving a band uncut at the bottom, roll up the paper over a pencil, (to curl the fringe) then roll the bottom band around the bottom of a pencil to get the flower or fireworks shape.  I layered 2 together and used a hot glue gun to attach to the banner.  I glued a clear rhinestone in the center.


I used crepe paper streamers to make the large rosettes* under each letter. 
This one was sprayed with glimmer mist and edged in red acrylic paint.

I outlined the "JULY 4th" with crystal lacquer to make it shiny.


Well, that's it for today.  I hope you all enjoy your 4th of July holiday - hey, make a banner!

Our Design Team has a fun Blog Hop planned for June 30th.  I hope you can join us for it!
Here's a link to get more information and to RSVP -

For more information of Crystal Lacquer products, visit www.sakuracraft.com
and to check out the amazing design teams projects, visit www.crystallacquer.blogspot.com

Until Next time...stay creative!

* Chelsea had shared how to make these easy-peasy crepe paper rosettes on the Sakura Blog, but if you'd like more info on how to make them, you can just email me at katscrapfever@sbcglobal.net .

Sunday, June 19, 2011

Vintage Layout - Robin's Nest Design Team Entry


 I've been going through family photo boxes pretty regularly since my recent move, and just fell in love with this picture of my Mom, circa 1929, and decided that it needed some special attention.
Here are the supplies that I used for this 12 x 12 page layout.
1 12 x 12 sheet of Donna Salazar's Trunk in the Attic (Banana Nut Loaf)
1 12 x 12 sheet Donna Salazar's Trunk in the Attic (Nutmeg Nostalgia)
Vintage Photo
Up-cycled old dictionary pages die cut into scalloped circles
Crystal Color Lacquer (in brown and metallic gold)
Lace Ribbon
An Idea-ology Facet
An Idea-ology Trinket Pin
Glimmer Mist
Distress Ink
Copic Markers
3D Crystal Lacquer
Tape Runner
Ok, to start off, I used a real vintage photo that was mounted in a folder. I wouldn't have normally used this, but I was fortunate enough to have 2 of these pictures in my collection. I love the embossed framework and photographers name on the mat, as well as the dimension that it created on the page. Because of it's depth, I'll probably be putting this page into a shadowbox frame to display.
The first thing I did was to simply trace the swirls on the paper (Banana Nut Loaf) with  Crystal Color Lacquer. I love how it added a bit of shine, and really made the flourish images pop from the page. Note: It's important to let the Crystal Lacquer dry overnight...I know...we don't like to wait, but it's worth it! I used 3D Crystal Lacquer to adhere the Dew Drops to add to the flourish design. Just a teenie tiny drop does the trick.
I cut the sheet of Nutmeg Nostalgia paper about 3/4 of an inch larger than my matted photo. It was distressed on the edges using my Zutter Distrezz-It-All (love it!) and Distress Ink in Tea Dye. After gluing on the lace ribbon across the page, I adhered the distressed piece of Nutmeg Nostalgia, then my vintage photo.
Now on to the fun part, the flowers. These as SO easy, it's kind of embarrassing to say they are just scrunched up pieces of old dictionary paper. I die cut old pages of dictionary pages using my AccuCut and 2 different sized scallop circle dies. I sprayed them with various colors of Glimmer Mist, dried them with my Heat Gun, and crumpled them up....several times. I then stacked as many as I wanted for my flower, lay them on my craft sheet and start squishing them from the center until I'm pleased with the look. I squirted out some Crystal Lacquer on my craft sheet and squished the flower down.....boom - done. In a few hours, they are dry and just lift off the craft mat, ready to rock and roll. For the centers of these flowers, I used the Dew Drops in clear, colored with Copic Markers. They were glued onto the flowers with Crystal Lacquer.
Now for the finishing touches. For the Facet charm, I printed my Mom's name and year the photo was taken onto a left over piece of the Nutmeg Nostalgia, placed a few drops of Crystal Lacquer over the words, and placed the Facet on top, pressing to make sure there was a good bond between the two and no air bubbles. After it dried for a few hours, I just cut around the Facet, poked a hole through the paper, added a jump ring and attached it to the bottom of a Trinket Pin, which I then pinned to the lace bow on the page.


I had fun sharing my project with you.  I'm trying out for the Robin's Nest Design Team with this project, so if you liked it, I'd appreciate it if you would leave me a comment, or two...can't ever get enough love!

Until next time....stay creative!

Check out the Robin's Nest website at http://www.robinsnest-scrap.com/ 
and their Blog at http://www.chatteringrobins.blogspot.com/ for ideas and inspiration.